On-Call
This document highlights the steps for responders on how to acknowledge incidents escalated via incident.io and for on-call engineers on how to escalate to teams via incident.io.
Responder Quick Start guide
Section titled “Responder Quick Start guide”- All manual escalations to the Infrastructure teams will now be via incident.io , if your team is still in an oncall rotation in PagerDuty , you will still be paged by PagerDuty for alerts please acknowledge the page in PagerDuty but all manual escalations to you/your team will be via incident.io oncall.
- Please install the incident.io app on your mobile device for ease
- Installing the app is recommended, but not required. Without the app, you will still be able to get paged via SMS and call.
- Log in with SAML, which will use Okta.
- To test that notifications work:
- Open incident.io via the Okta tile.
- Navigate to user preferences, which is in the :newtanuki: menu, top-left.
- In the
Contact methodssection, there is a bell icon next to each method that can be used to send a test notification.
-
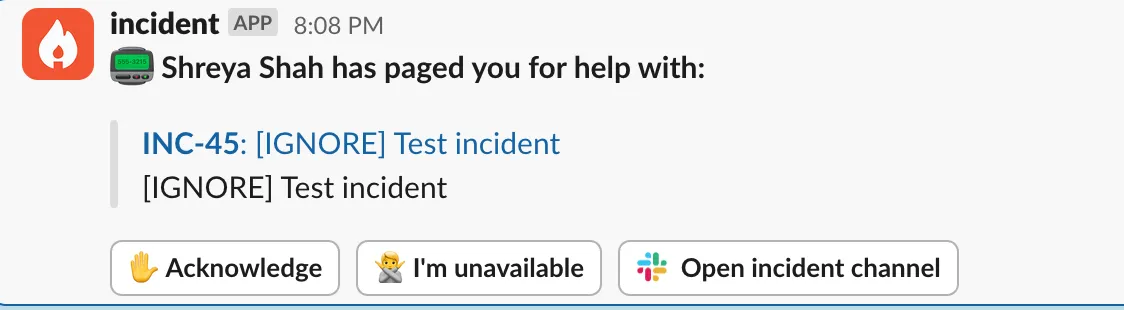
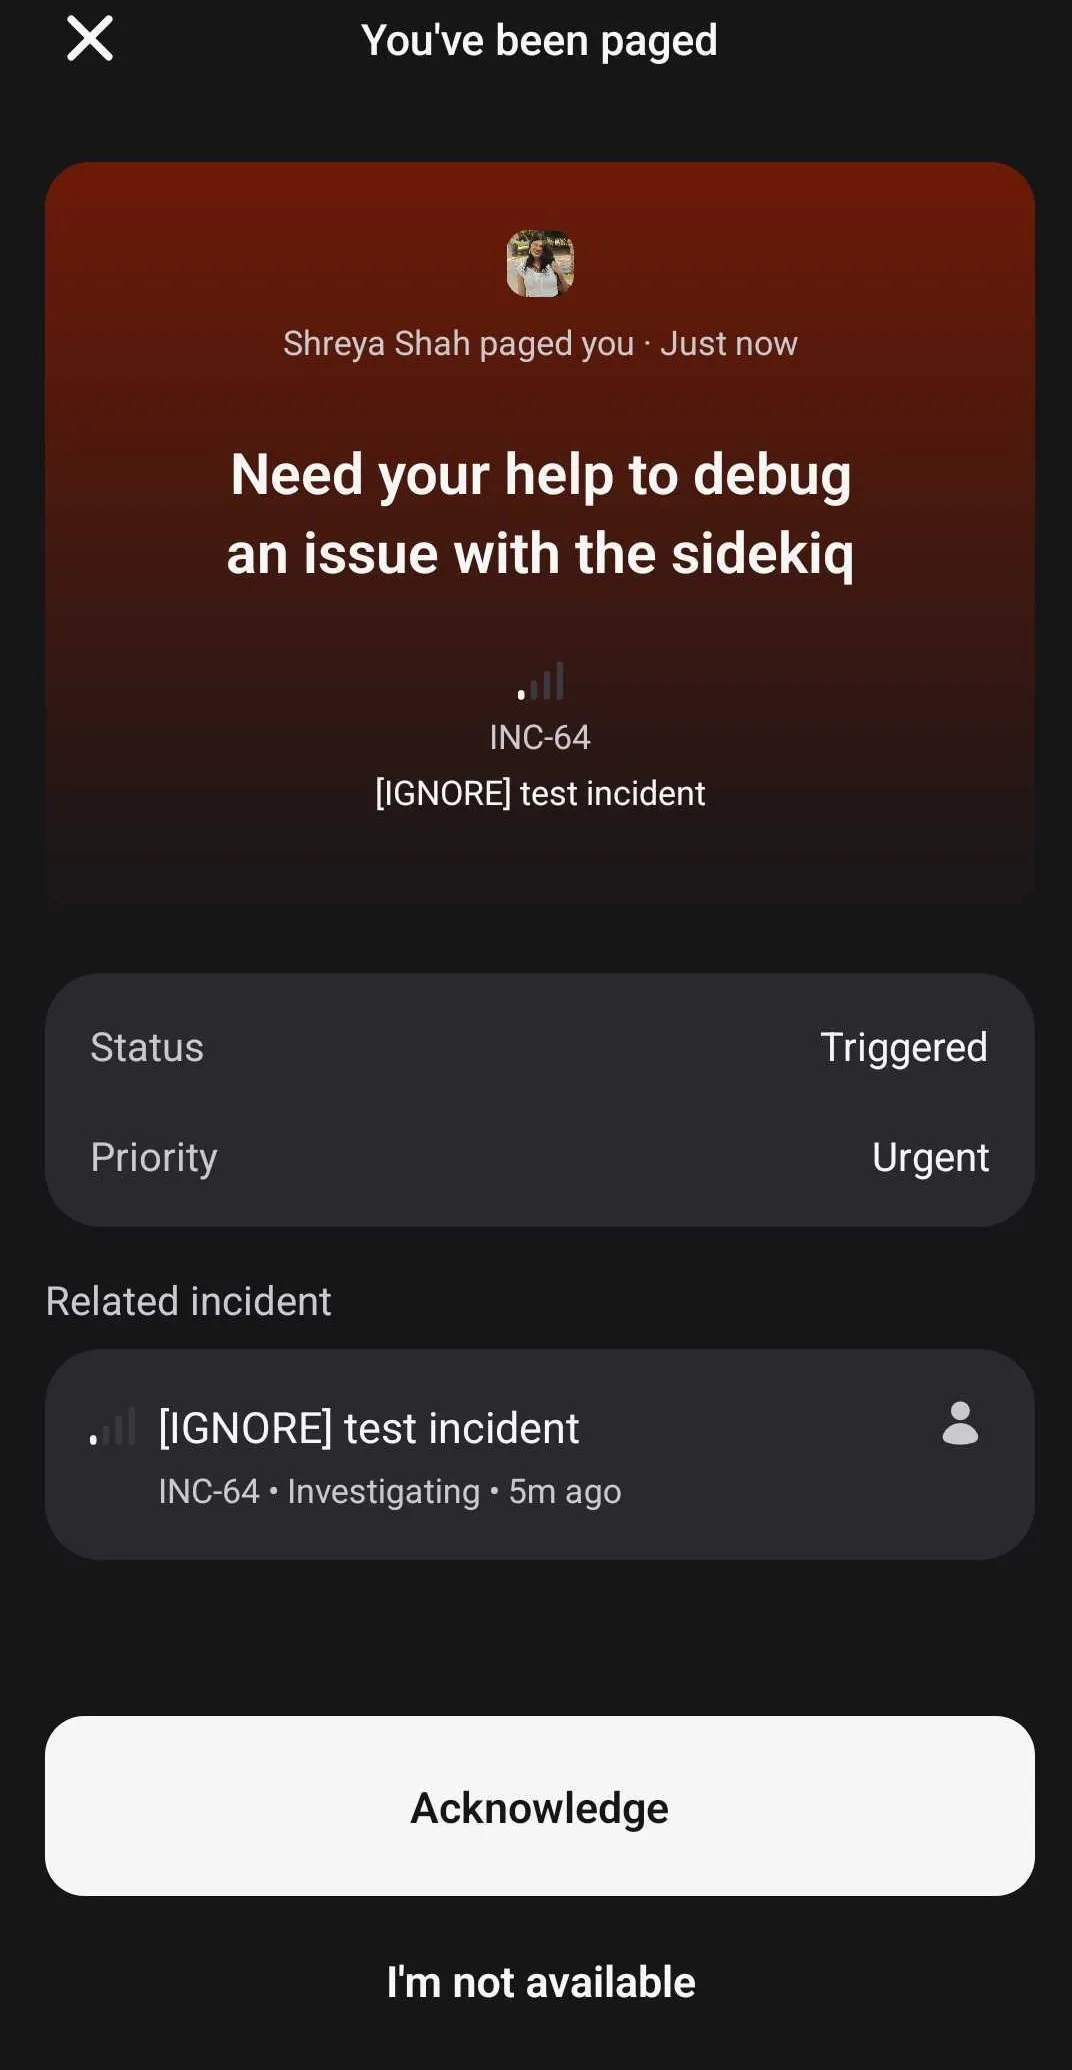
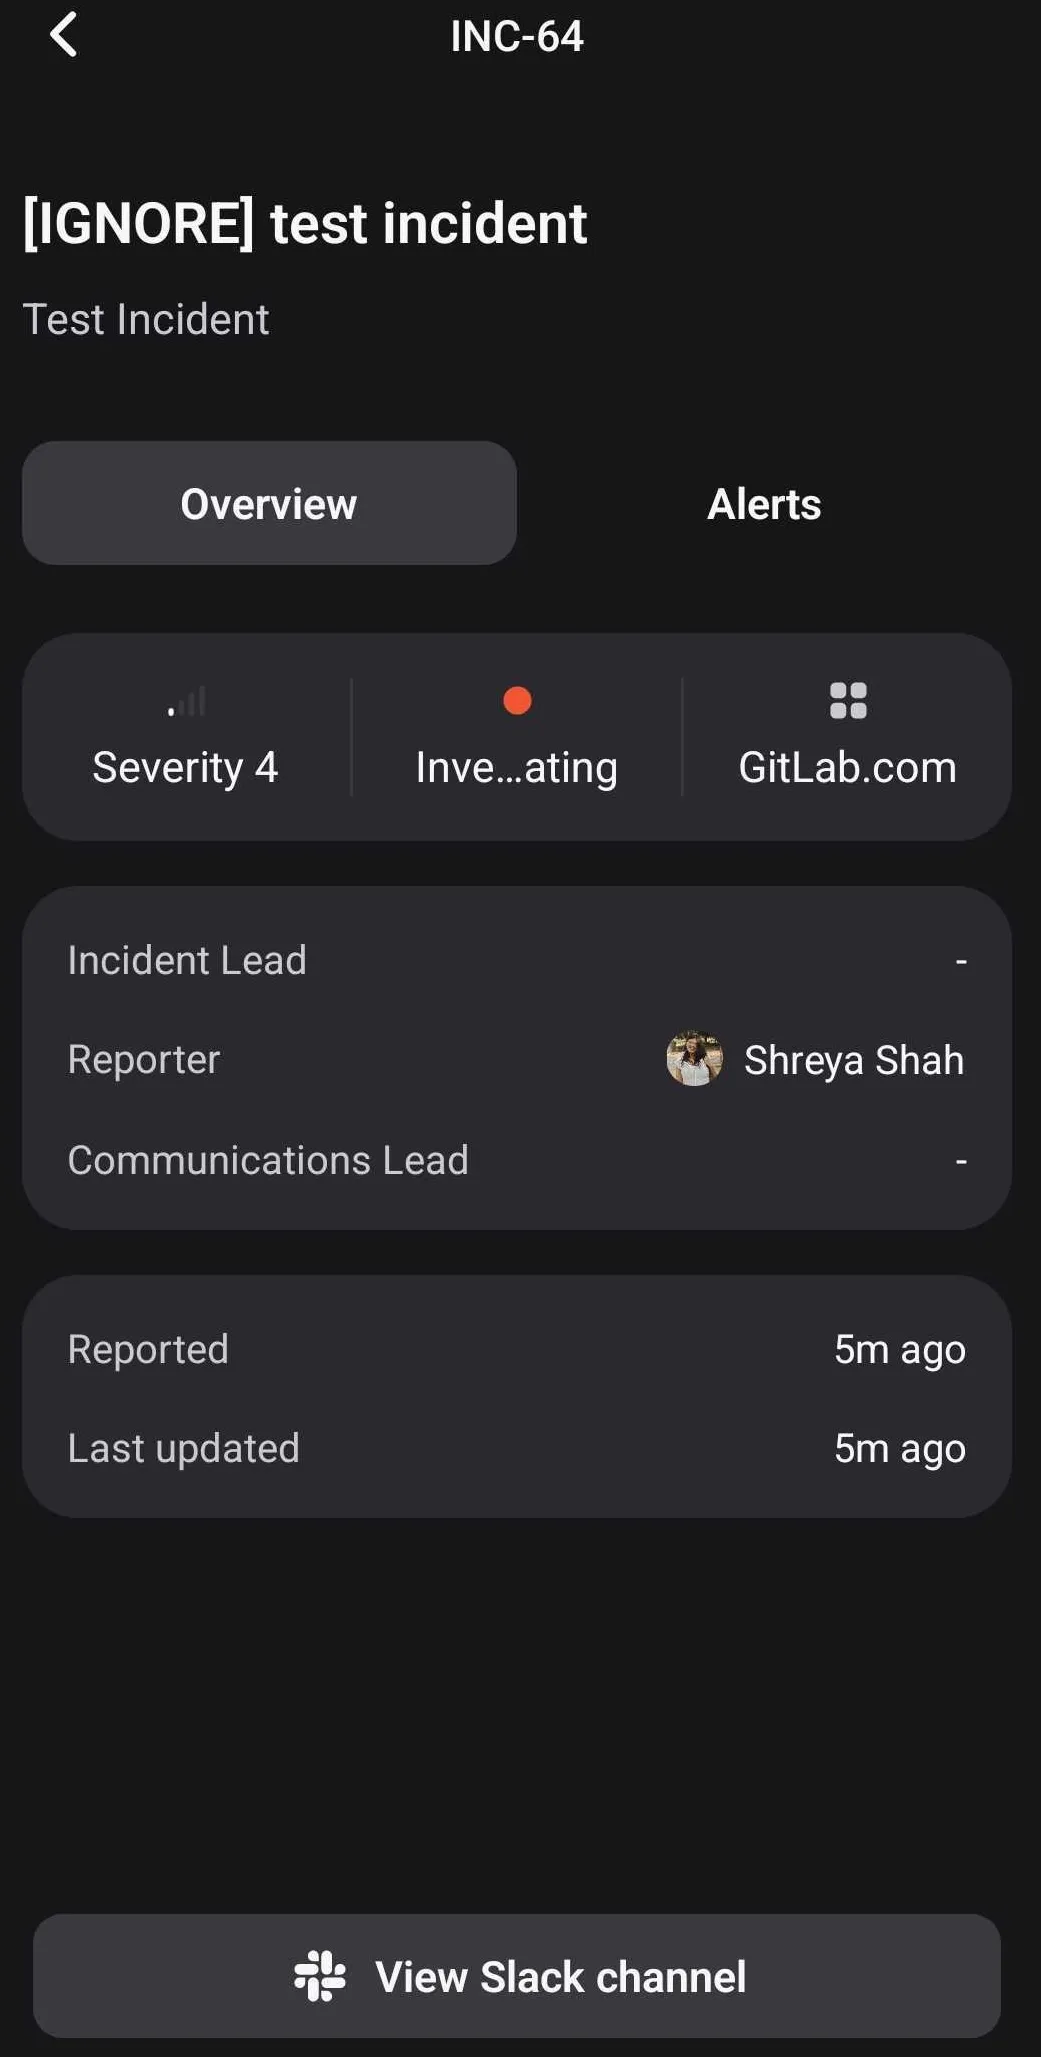
Once you are paged via incident.io , you can acknowledge an incident either via the incident.io app , or through Slack , from there you can easily navigate to the incident slack channel
-
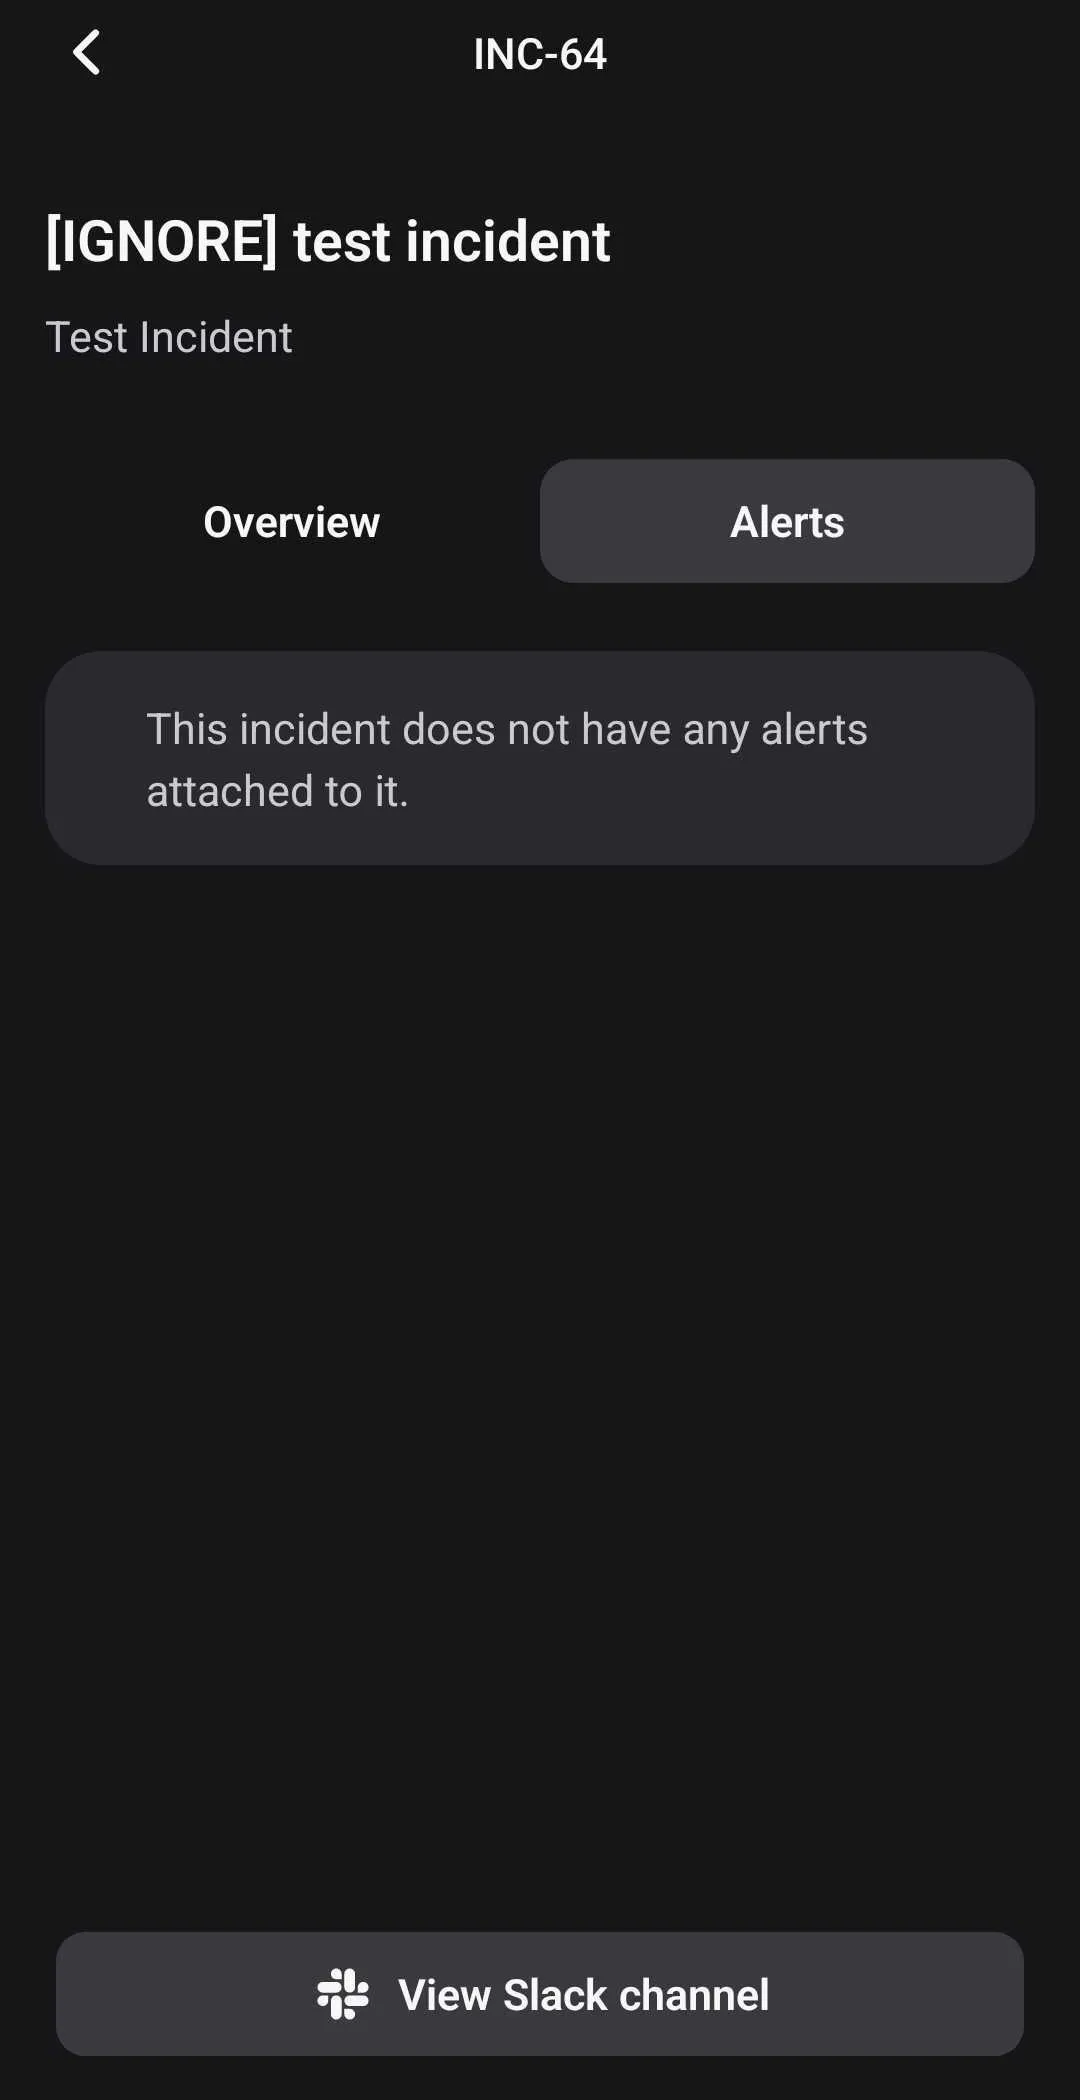
See the following screenshots of the incident.app mobile app showing a page that has been received. To view the alerts, you can switch to the Alerts tab.
-
Once in the incident slack channel you can start troubleshooting the incident , join the incident zoom call and use the available commands for several actions.
On-call alert handling process
Section titled “On-call alert handling process”This is something we are iterating on. The process is:
-
Acknowledge page within the response time ie: within 15 minutes , 10 minutes for Customer Emergency On-Call Rotation
-
Check if it’s related to an active incident in the Production project
-
You can declare an incident by using the command
/incident declare. All incidents will typically be announced in the#incidentschannel. To only view announcements for incidents of typeGitlab.com, please navigate to#incidents-dotcom. -
Declaring an incident will generate an incident Slack channel and Zoom call for you.
-
You can choose to Block Deployments, Feature Flags, or Keep the issue confidential by updating the respective custom field using the command
/incident fieldfrom the incident Slack channel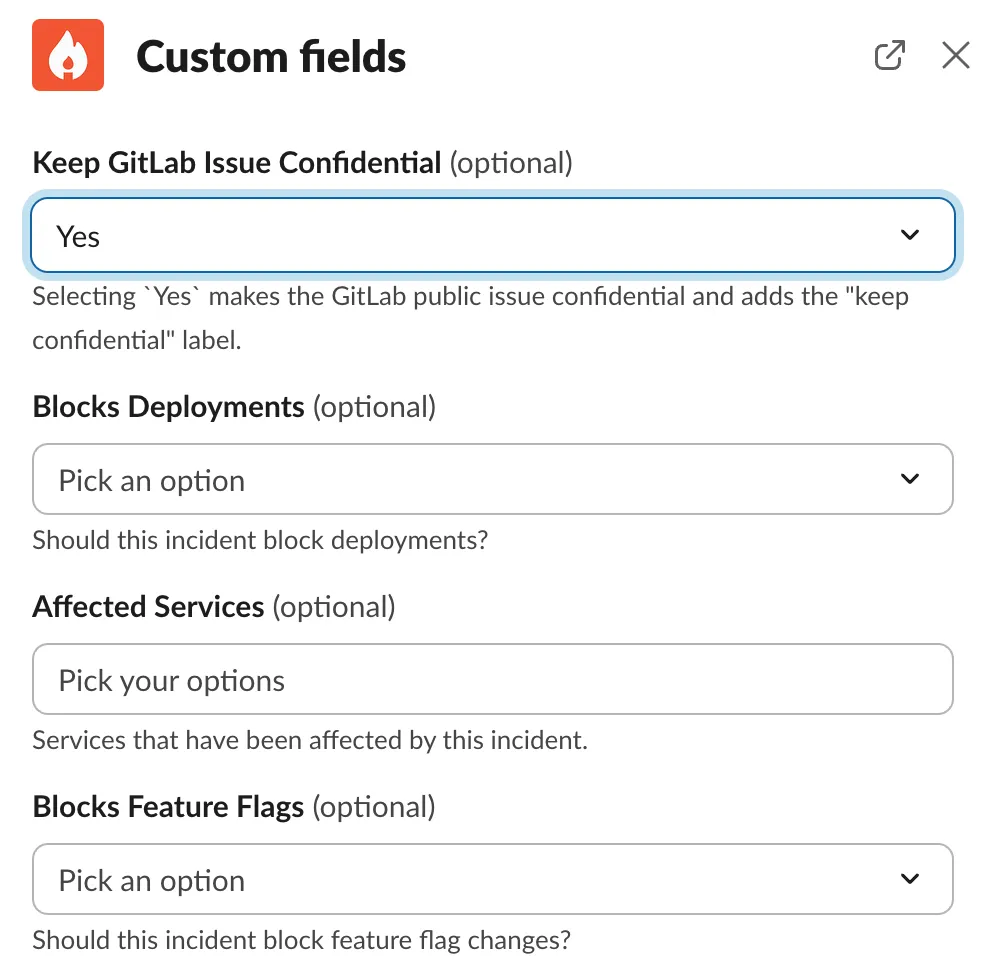
-
An incident management project issue will be automatically created and linked to the incident.
- See How to raise an incident for detailed steps.
-
EOC is automatically assigned the incident lead for all S3 and S4 incidents , IMOC is automatically assigned lead for all S1 and S2 incidents , if you wish to change the incident lead for some reason , please use
/incident leadcommand -
Begin working on the alert
Working on the Alert
Section titled “Working on the Alert”When working on an alert, you’ll collaborate in the incident-specific Slack channel created by incident.io. Use the incident’s Slack channel for all investigation notes and updates. Key information can be pinned using the :pushpin: emoji, which will automatically be reflected in the incident.io dashboard and GitLab issue.
Important investigation details to document:
- Screenshots and evidence: If any information is provided via screenshots, make sure to add a
Sourcelink to each screenshot. Make sure to use absolute time - and notLast x hoursornow-x hours.- In Grafana, click
Share>Copyfor the link; this will ensure the link is locked to the chosen time. Note:Shorten URLdoes not work. - In Kibana, click
Share>Get Links> ToggleShort URL>Copy link; this ensure the link works correctly and retains filters.
- In Grafana, click
- Use Zoom calls when needed for real-time collaboration, and utilize incident.io’s Scribe feature to summarize call discussions directly in the incident channel.
- Regular status updates can be posted using incident.io’s update feature via the
/incidentcommand.
You can use :boom: emoji in Slack to assign an action related to the incident , Assigning an action does not create a Gitlab issue or MR.
As you work through an investigation, it is important to keep track of any ~“corrective actions”s (label: ~corrective action) that need to be followed up on. Some strategies are to note these in the Investigation Thread or create a separate Corrective Actions thread to keep as reference. Once the Incident is over, the EOC should create Issues for the ~“corrective actions”s, as detailed in Post-Incident Responsibilities.
Manual Escalation
Section titled “Manual Escalation”-
These steps highlights the way to escalate to a team or individual , CMOC , IMOC during an incident.
-
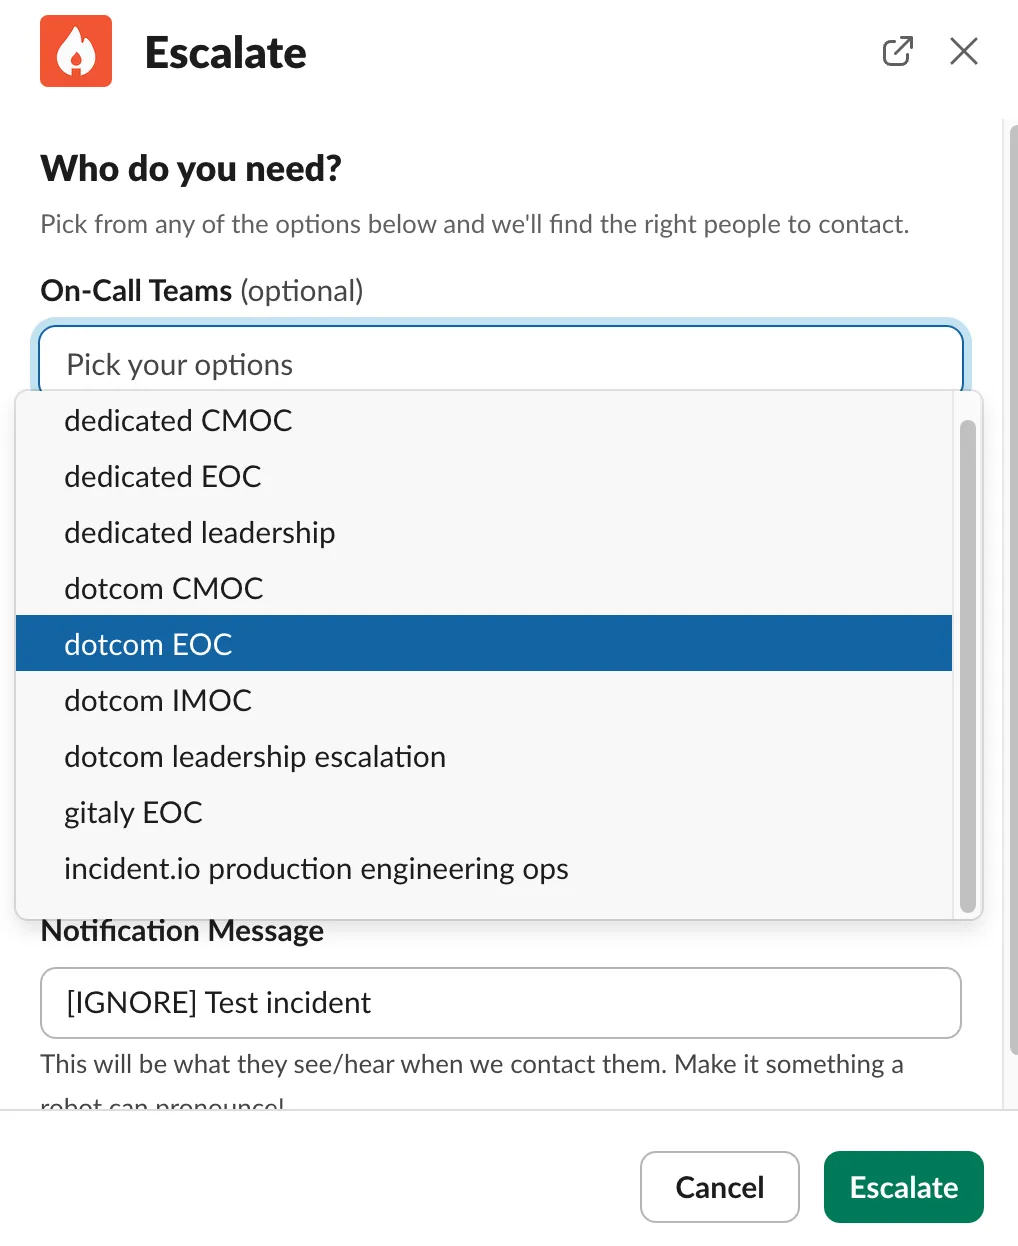
From the incident channel once you wish to escalate to a team / individual , use the command
/incident escalate, this should trigger an escalation form pop-up
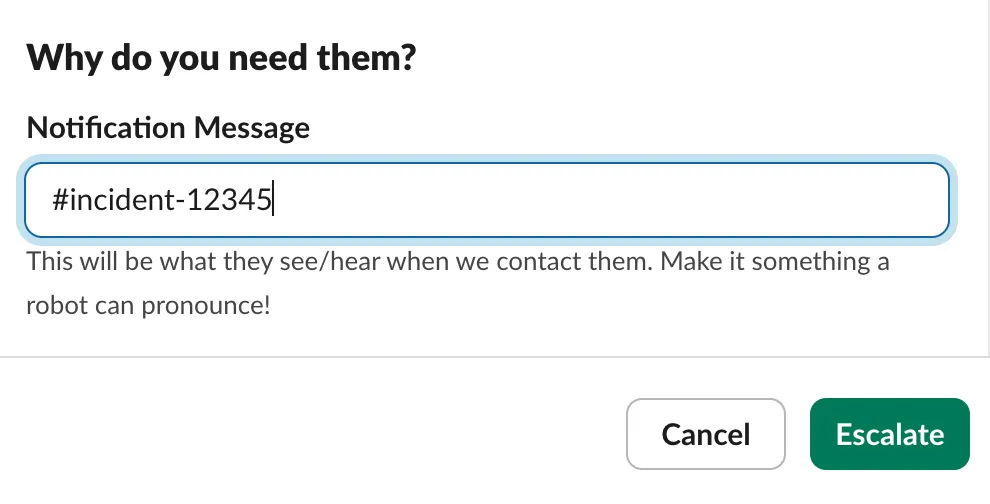
-
Choose the oncall team you wish to escalate to from the drop-down menu / the individual you wish to escalate to , you can enter an optional notification message you would wish for the responder to see
-
Page Security : for medium/high severity incidents, refer to how to engage the SEOC. For lower severity incidents, refer to the incident severity table to determine the right course of action
-
Page Dev : by typing /devoncall incident-issue-url into #dev-escalation. Handbook
Note- When escalating from a woodhouse generated Slack channel please mention the incident slack channel in the Notification Message (( not recommended ))
Incident Lifecycle
Section titled “Incident Lifecycle”We manage incidents using incident.io. When an incident is created using /incident create in Slack, it automatically creates both a dedicated Slack channel and a GitLab issue. Lifecycles are defined here. The incident has a few especially notable stages:
Active
Section titled “Active”Active incidents are managed through:
- The incident-specific Slack channel created by incident.io
- The automatically created GitLab issue in the incident management project
- The incident.io dashboard - see Navigating through an incident
View currently active incidents.
Monitoring
Section titled “Monitoring”An incident is considered in a monitoring status in the following scenarios :
- The problem has been alleviated or addressed (at least temporarily) but may reoccur.
- The problem is no longer active but we are still waiting for alerts to clear.
Update the incident status using the /incident command in the incident’s Slack channel to reflect mitigation. This will update the status of the incident in incident.io. When the incident is resolved, you will separately need to close the incident issue.
View currently mitigated incidents
Closed
Section titled “Closed”The incident is resolved when it is fully addressed. Use incident.io’s Post-Incident workflow to properly close out the incident, which may include creating a post-incident review. Incident reviews are typically performed for all S1 and S2 incidents or if an incident review is requested as per GitLab’s incident review process.
View currently resolved incidents.
Post-Incident Responsibilities
Section titled “Post-Incident Responsibilities”-
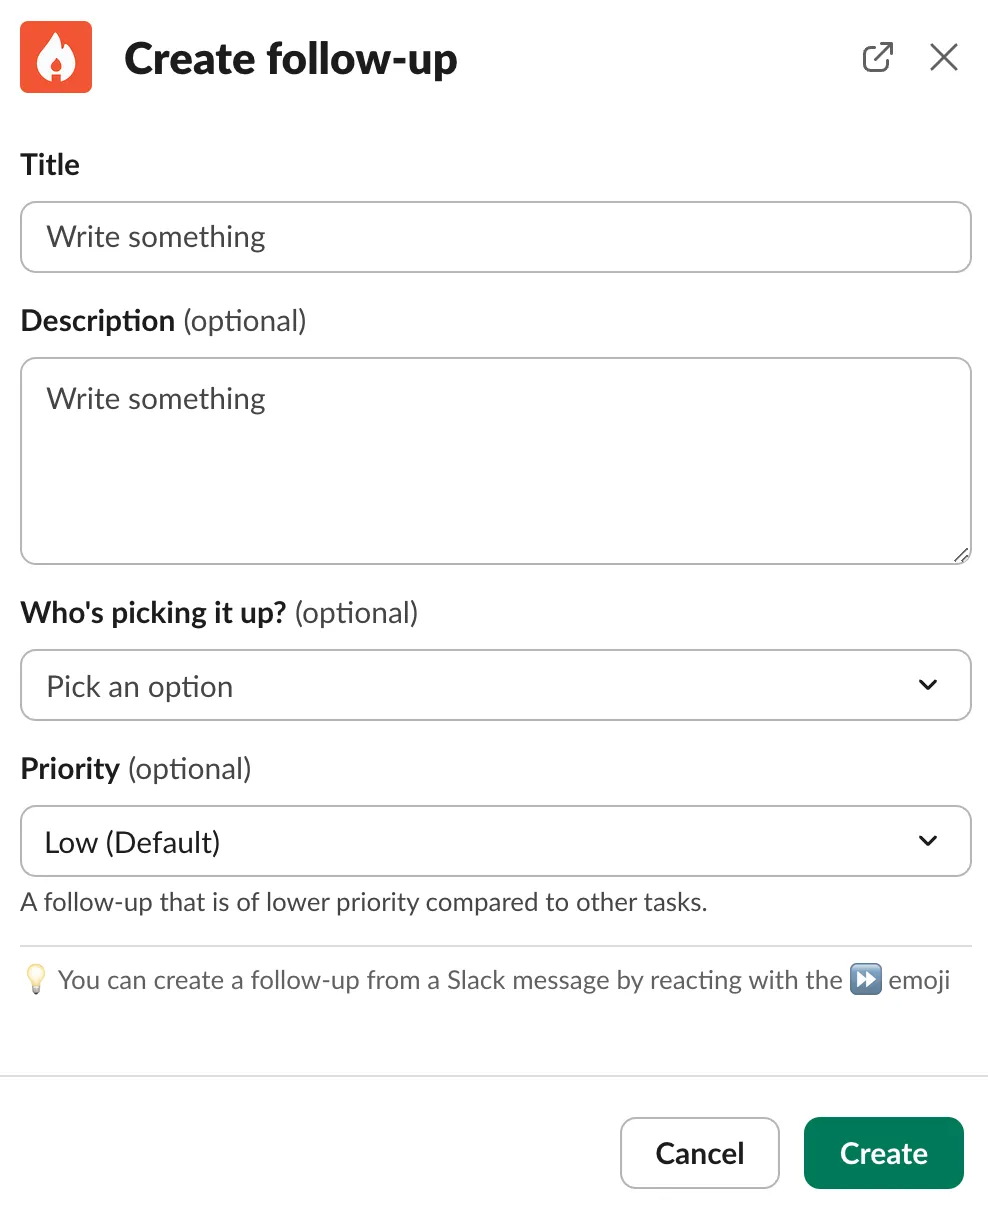
Follow-ups are a way for your team to capture something that needs to be done after an incident is closed. These will come in all shapes and sizes, from an urgent task such as reverting a temporary workaround, to a low priority task such as investigating how to move to a new cloud provider. You are able to assign each follow-up a priority, to capture this level of importance within incident.io.
-
Create follow-ups by using the command
/incident follow-up, this opens up a form , fill in the required title and assign it to yourself or someone else as required
_Note : Follow-ups create a Gitlab issue _
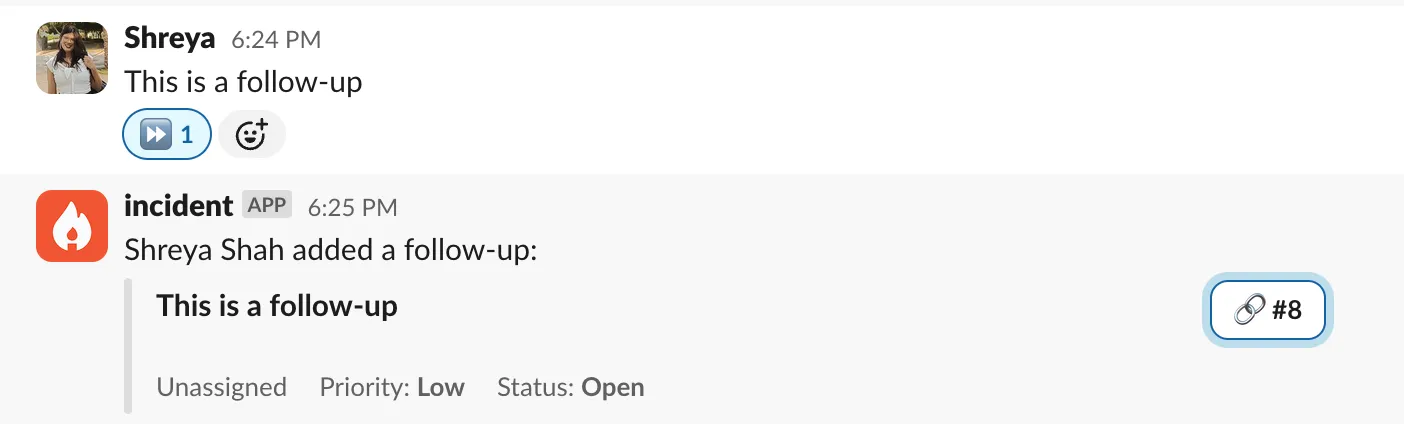
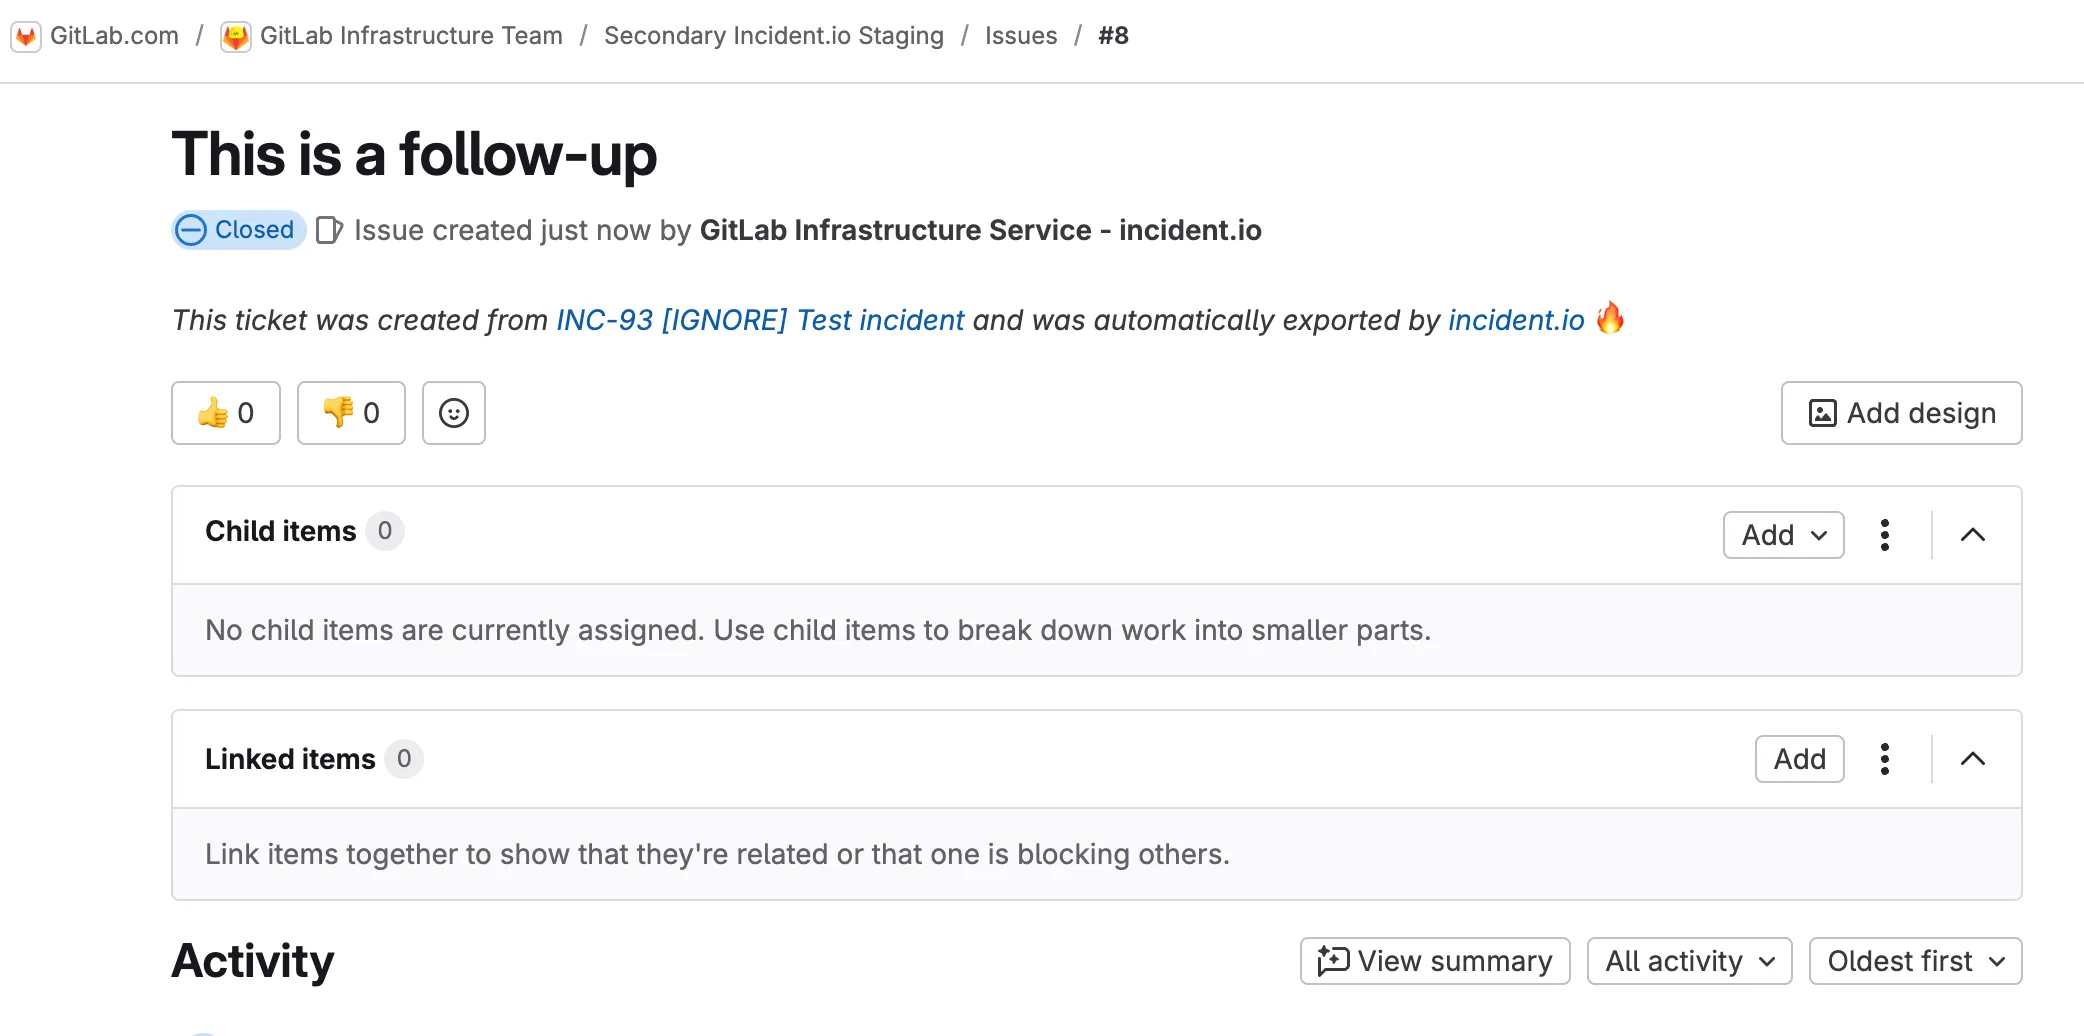
-
Alternatively you can also create a follow-up by reacting :fast_forward: to a message on Slack , this creates a Gitlab issue